Creating a new project and its structure
A blank project
Head on over to File > New > Project…

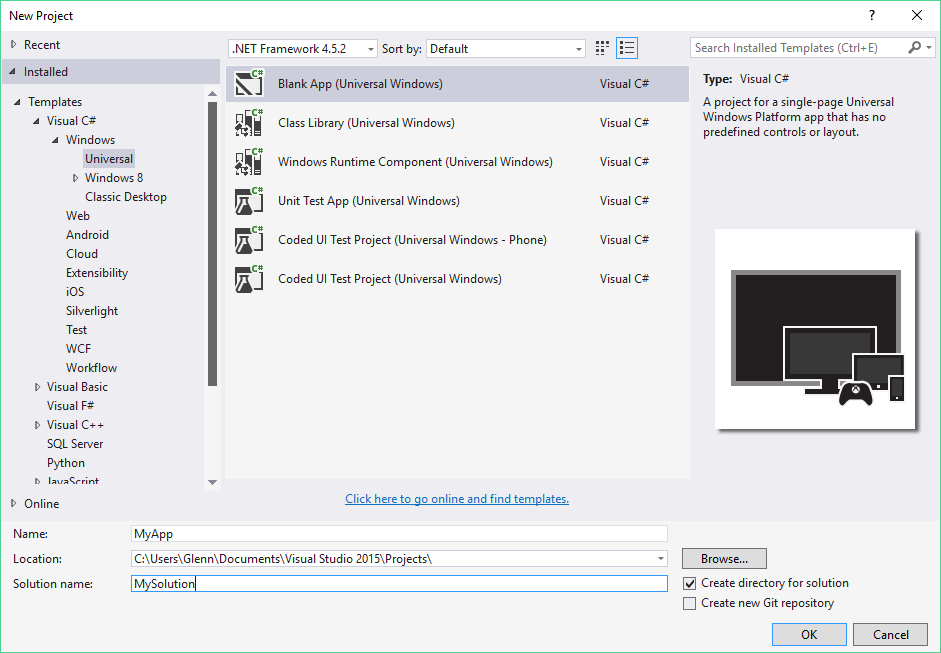
This will open the New Project dialog. In the treeview, go to Installed > Templates > Visual C# > Windows > Universal. Click on Blank App (Windows Universal).
There are three properties:
- Name: the name of the project
- Location: the path where all files will be saved
- Solution name: name of the collection of projects
Once done, press Ok to create the solution and project.
Then you will be asked for a target version. The minimum is 10240, this is fine and will suit most apps.
If your app requires any features specific to the Anniversary Update, you will need to select the Anniversary Update build number as target and minimum version.
Press Ok when done.

Overview of the project
App.xaml.cs
The project will now open and a file App.xaml.cs will be opened. This file is the core of your project and will be executed before anything else.
You can find this file by looking at the Solution Explorer, click on the arrow to the left of App.xaml and you’ll see this file.
The first function of interest is the OnLaunched. This function will initialize the interfaces for your app and activate your app. Let’s have a closer look.
The following piece will show the framerate counter, feel free to remove this code or set it to false.
#if DEBUG
            if (System.Diagnostics.Debugger.IsAttached)
            {
                this.DebugSettings.EnableFrameRateCounter = true;
            }
#endif
Next up we see how a Frame is created. Frames are the views you actually see, navigation is done with Frames so you can navigate and go back and forth between frames. We’ll discuss this more in the Navigation tutorial.
The following code generates a rootFrame, when the app launches the rootFrame will be null so we need to create a new Frame. Then we assign it to the current window’s content. By doing this we will be able to see the Frame. But now the content of the Frame is still empty so we need to Navigate to a page, in this case the MainPage.
You can find the MainPage on the right in the Solution Explorer.
Once the navigation is done, we tell the app to activate.
            Frame rootFrame = Window.Current.Content as Frame;

            // Do not repeat app initialization when the Window already has content,
            // just ensure that the window is active
            if (rootFrame == null)
            {
                // Create a Frame to act as the navigation context and navigate to the first page
                rootFrame = new Frame();

                rootFrame.NavigationFailed += OnNavigationFailed;

                if (e.PreviousExecutionState == ApplicationExecutionState.Terminated)
                {
                    //TODO: Load state from previously suspended application
                }

                // Place the frame in the current Window
                Window.Current.Content = rootFrame;
            }

            if (e.PrelaunchActivated == false)
            {
                if (rootFrame.Content == null)
                {
                    // When the navigation stack isn't restored navigate to the first page,
                    // configuring the new page by passing required information as a navigation
                    // parameter
                    rootFrame.Navigate(typeof(MainPage), e.Arguments);
                }
                // Ensure the current window is active
                Window.Current.Activate();
            }
MainPage
This page doesn’t serve any significance, but is always created with a new project so when you launch the app there would be at least an empty page to show.
A new xaml page always contains an empty Grid, this is where you’ll put all your controls.
<Page
    x:Class="MyApp.MainPage"
    xmlns="http://schemas.microsoft.com/winfx/2006/xaml/presentation"
    xmlns:x="http://schemas.microsoft.com/winfx/2006/xaml"
    xmlns:local="using:MyApp"
    xmlns:d="http://schemas.microsoft.com/expression/blend/2008"
    xmlns:mc="http://schemas.openxmlformats.org/markup-compatibility/2006"
    mc:Ignorable="d">

    <Grid Background="{ThemeResource ApplicationPageBackgroundThemeBrush}">

    </Grid>
</Page>
The code-behind page contains only the constructor of the page.
namespace MyApp
{
    /// <summary>
    /// An empty page that can be used on its own or navigated to within a Frame.
    /// </summary>
    public sealed partial class MainPage : Page
    {
        public MainPage()
        {
            this.InitializeComponent();
        }
    }
}
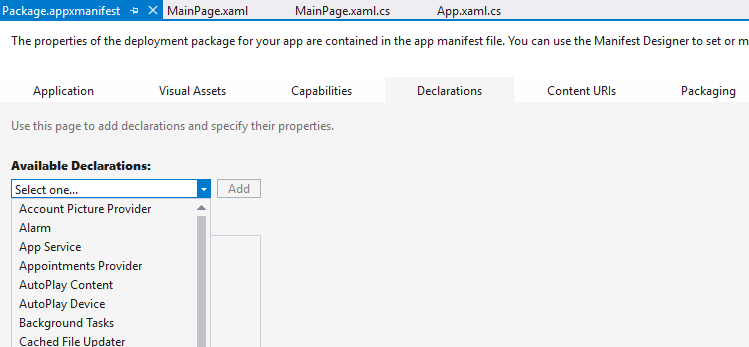
Package.appxmanifest
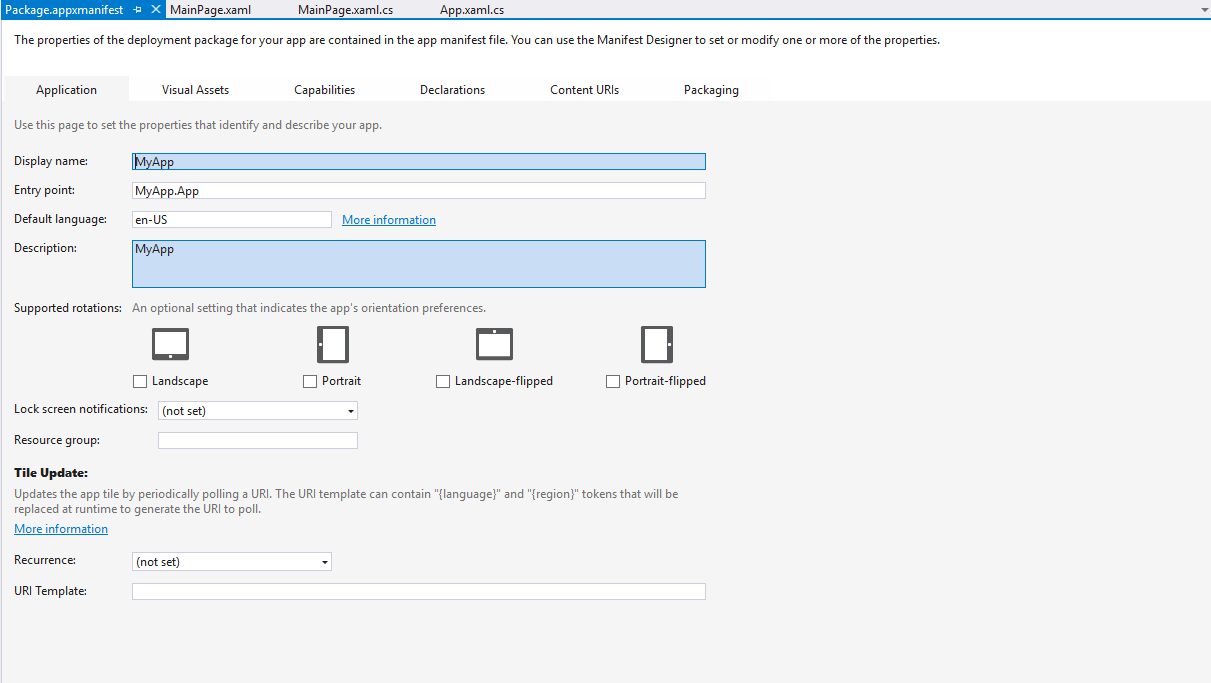
In the appxmanifest you will set permissions, app name, … . Let’s go over the most important ones.
The Application tab let’s you set the name and supported orientations of the app.
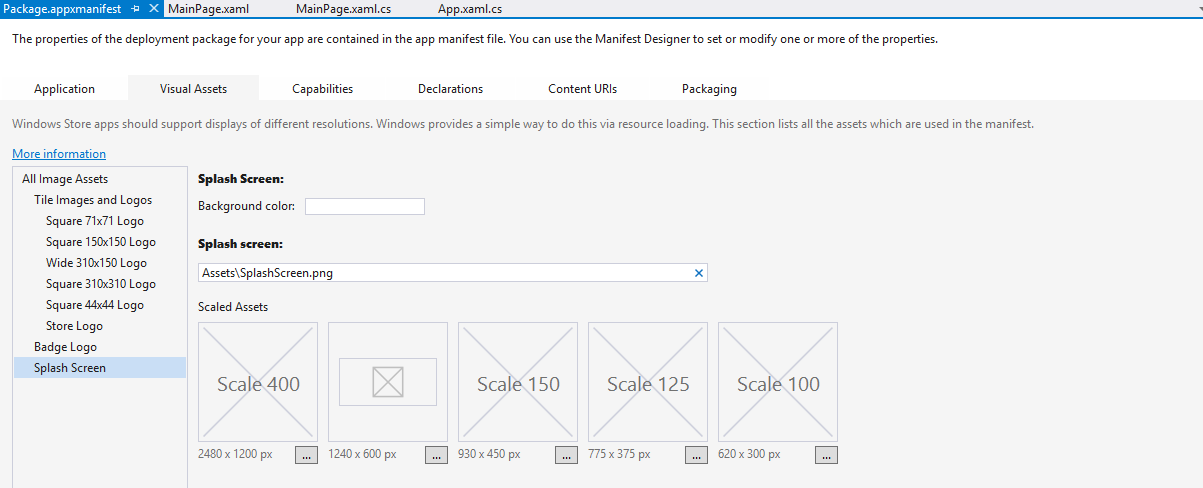
Visual assets sets the path of the images for the icons and live tiles. It also sets the background color of the splash screen.
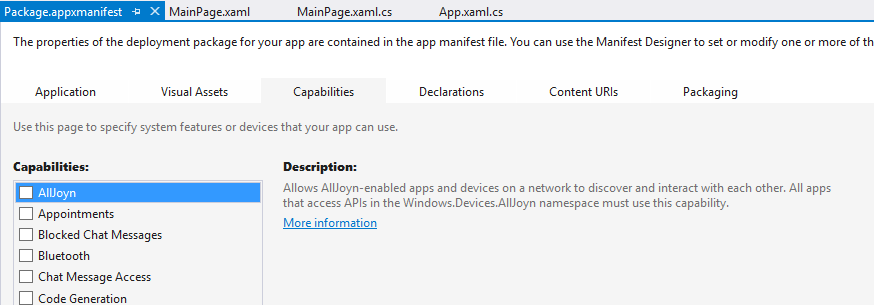
In Capabilities you’ll define the permissions your app requires, for example Microphone access. These capabilities will also be list in the store so users will know what your app has access to.
Declarations is the place for defining things that usually happen in the background, like background tasks.
That’s the basic structure of a project. In the following tutorials you’ll see how everything works together.
